How To Start a Fitness YouTube Channel
You’ve decided to start a YouTube channel. Good for you! It’s time to take your fitness game—and your ability to inspire others—to the next level.
Starting a fitness YouTube channel can feel overwhelming, with so many options and strategies to consider. But the good news is that YouTube has made it easier than ever to share your passion for health and fitness with a global audience, whether you’re just starting out or looking to refine your approach.
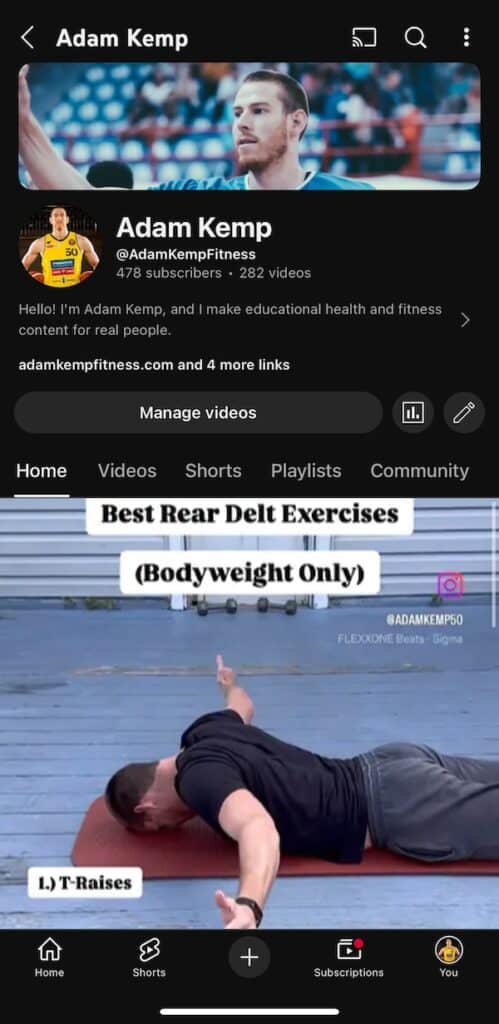
Personally, I’ve found incredible value in recording and sharing my fitness journey on YouTube.
I primarily post YouTube Shorts, which has been a fun and creative way to showcase exercises and fitness tips quickly. While focusing on Shorts makes it challenging to meet YouTube’s monetization requirements, it’s been rewarding in other ways.
Helping people improve their health and get into better shape has always been my main goal, and I love the immediate connection Shorts provide.
Over time, I plan to expand back into longer-form videos, like those I used to create, to provide more in-depth content and share detailed fitness advice.
While my channel hasn’t been a big money-maker yet, starting a fitness YouTube channel has been one of the most rewarding decisions I’ve made.
It’s a platform where passion and purpose come together, even before the dollars start rolling in.
Why is it a Good Idea to Start a Fitness YouTube Channel?
Starting a fitness YouTube channel is an excellent idea for several reasons, particularly if you’re passionate about health, wellness, and helping others achieve their fitness goals.
With the growing demand for accessible, expert-led fitness content, YouTube provides an ideal platform to share your knowledge and establish yourself as a trusted voice in the industry.
Reach a Global Audience
YouTube allows you to reach a global audience at no cost, enabling you to share fitness expertise with millions.
Whether you’re demonstrating exercises, explaining nutrition concepts, or providing motivational content, your channel can inspire viewers worldwide.
Establish Authority and Build Your Brand
A fitness YouTube channel positions you as an authority in the field. Consistently sharing well-researched, engaging content helps build trust and credibility, which can lead to opportunities such as partnerships, sponsorships, or even launching your own fitness programs.
Generate Passive Income
YouTube offers multiple ways to monetize your channel, including ad revenue, affiliate marketing, and brand sponsorships.
If your content is engaging and consistent, a fitness YouTube channel can evolve into a significant source of passive income.
Connect with Like-Minded Individuals
A YouTube channel allows you to build a community of fitness enthusiasts.
Engaging with viewers in the comments section develops meaningful relationships and opens opportunities for collaboration with other fitness creators.
Inspire and Motivate Others
Sharing your fitness journey or expertise can profoundly impact people’s lives. Your channel can be a source of motivation for viewers, helping them achieve their goals, overcome challenges, and live healthier lives.
Learn and Grow as a Creator
Creating a YouTube channel encourages personal growth.
You’ll hone skills in video editing, storytelling, and content creation, while deepening your knowledge of fitness topics to provide valuable and accurate information to your audience.
Starting a fitness YouTube channel not only allows you to express your passion for health and wellness but also creates opportunities to inspire, connect, and grow both personally and professionally.
How to Start Your Own Fitness YouTube Channel
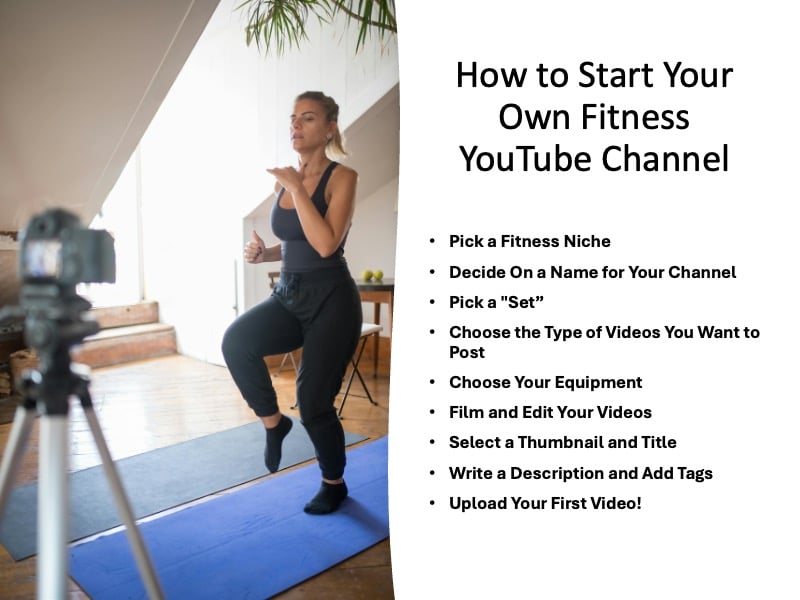
Starting a fitness YouTube channel is a rewarding way to share your passion, connect with others, and inspire healthier lifestyles. With careful planning and authenticity, you can create content that stands out and makes a lasting impact.
Pick a Fitness Niche
You should pick a fitness niche that interests you. If you start a channel and have no interest in the topic, it will be difficult for you to continue creating content over time.
You will lose motivation and interest in your work if it isn’t something that truly excites you.
Pick a niche that interests you, and make sure there are enough people out there who share those interests so they can consume your content!
Are you into yoga? Body-building? Aerobic exercises? Weight-loss exercises?
This is important because if there aren’t enough viewers of your videos, then those viewers won’t be able to support your business financially through advertisements or other means (like donations).
Also, think about how much competition exists within this market before deciding on what niche would be best suited for yourself as an individual personality.
Don’t choose something just because it seems easy but rather think about where you want to spend most of your time researching information so that eventually over time when building up traffic numbers becomes easier due to consistent posting schedules being set up monthly/quarterly terms.
These goals should align with how much effort goes into making new videos each week based on how many subscribers may follow along with what types of topics will keep them coming back time after time again.
Decide On a Name for Your Channel
Once you’ve decided to start a fitness YouTube channel, it’s time to pick a name for your channel. There are several things to consider when choosing the best possible name for your new channel.
- Pick something easy to remember and spell: This is especially important if you want people outside of your gym or community who might not know about your business or product yet.
- A catchy name goes a long way toward making these viewers feel like they’ve stumbled onto something special by stumbling across your channel—and if they feel that way, they’ll be more likely to subscribe and follow along on other platforms (like Facebook or Instagram).
- Pick something easy to pronounce: While this isn’t as obvious as being easily remembered, it’s still important in building an audience that will stick around long enough for you get results from them!
- You definitely don’t want anyone saying “How do I pronounce…” before clicking away from the video so they can go look up another one instead.
Pick a “Set”
When choosing a set, you should consider:
- How easy will it be to clean the floor of your studio?
- A slippery and dirty surface can be dangerous for your viewers and may cause them to lose their footing while trying to perform exercises. If you have pets or children who might bring in dirt or other contaminants, look for a material that resists stains and spills as well as being easy to clean with soap and water or a damp mop.
- Most sets need some type of storage space when not in use so that they don’t take up valuable square footage in your home—especially if space is limited.
- Look for one with collapsible frames that fold flat when not needed so that your space is maximized during off-camera hours (and, if possible, keep all parts together when storing). You’ll also want storage bags for any props or pieces used during shoots (like dumbbells) so they’re always ready at hand without filling up precious closet space.
- Transportability/mobility options like wheels or handles make moving these items easier than ever before!
Choose the Type of Videos You Want to Post
There are tons of different types of videos out there, and all have their own niche audiences, so take some time to think about what type of videos would be best for your audience.
Here are some examples:
- Tutorials: These can range from anything from makeup tutorials and hair tutorials all the way down to workouts and recipes.
- Reviews: If you’re into fitness or health-related products like supplements, books, or equipment, then this is something that could work well for your channel.
- It’s also good if you want people to apply your advice when buying clothing or equipment as well as reading reviews on books before they buy them!
Tips: These can be about anything from dieting tips for weight loss to how to get more sleep at night.
Choose Your Equipment
When you’re ready to begin, the first thing you’ll need is a camera. These days, most people use their smartphones or point-and-shoot cameras for this.
However, if you have a DSLR (digital single-lens reflex) camera and lens that is compatible with your chosen editing tool, it’s best to use that instead—it will give your videos better quality!
Next up is the microphone: often overlooked by new vloggers but essential for creating high-quality audio.
The next two things on our list are tripods/monopods/steadicams and laptop computers with editing software installed (this can be done through Adobe Creative Cloud).
Film and Edit Your Videos
Now that you have your equipment, it’s time to start filming. Test your webcam/camera and audio —if you’re using one—and ensure they’re working correctly. After that, import your video into a video editing tool.
Once you’ve edited the footage, cut out any unnecessary parts at the beginning and end of the clip (like when someone walks up behind me). Next, add a title and description of what you’re doing in the video (i.e., “This is how I do my hair”).
You might also want to add music or transitions between different segments of the exercise routine so that it feels more polished.
Select a Thumbnail and Title
Once you’ve decided on a name for your channel, you need to select a thumbnail and title.
You want to make sure that the thumbnail is eye-catching and descriptive.
If possible, ensure it’s large enough to be seen on mobile devices. It should also be short and descriptive so people don’t have to click through to find out what the content is about.
Write a Description and Add Tags
You should write a description that’s clear and concise. The more descriptive you are, the better your viewers will understand what the video is about and whether or not it aligns with their interests.
Try to limit it to 50 words or less—you want people to be able to read it in one glance. Here are some tips for writing good descriptions:
- Be clear about what kind of content your video offers upfront. If someone wants fitness advice, don’t lead them astray by telling them they’ll also get tips on hiking boots!
- Use active voice; think about how you would describe something if you were recommending a movie or TV show that was similar in theme/tone/etc., but different enough from yours so as not to be confusing.
Upload Your First Video!
This is the fun part! Upload your first video to YouTube and start promoting it.
- Upload your video to YouTube or create a channel on the platform of your choice, such as Facebook or Instagram.
- Make sure your video is optimized for search engines, mobile devices, social media platforms and other places where people can find videos—like video discovery apps like TikTok or Musical.ly (known as “short-form” video platforms)
Final Thoughts – Things to Remember Before Starting a Fitness YouTube Channel
Along with the tips for starting a fitness YouTube channel listed above, here are a few more thoughts:
- Start with a goal in mind
- Create a consistent schedule and stick to it
- Make your videos high quality and interesting to watch
- Build an audience by promoting yourself on social media, forums, and other websites
- Monetize your channel by using ads or sponsorship money
We hope you found this article on how to start a fitness YouTube channel helpful. It can be a lot of work, but the payoff is great for your audience and your wallet!
If you want more advice on how to grow your YouTube channel and make it more profitable, check out our other blog posts about the topic.
Read Next: How to Make Money with a Fitness Blog
