How to Get Healthy Shoulders and Eliminate Shoulder Pain
Shoulder pain and dysfunction are among the most common complaints for athletes and active individuals alike.
Whether you’re an elite performer, a gym-goer, or someone who spends long hours at a desk, shoulder health is critical.
As a professional basketball player who’s endured a variety of injuries and learned from world-class trainers across Europe and the U.S., I’ve developed a comprehensive strategy to build, maintain, and restore healthy shoulders—built on experience and evidence.
My own journey with shoulder health began during my freshman year at Marist College, when I tore the posterior part of my labrum in my left shoulder.
I dealt with recurring pain and subluxations for years, unsure if I’d ever regain true shoulder stability.
It wasn’t until the summer before my senior year—when I finally worked with a highly skilled physical therapist—that I learned how to train and stabilize my shoulder properly, even without undergoing surgery.
At the time, I avoided surgery because of its long and difficult recovery, and I feared I might never truly recover.
But once I committed to the right exercises, stretches, and recovery tools that improved muscle and fascial tissue quality, I discovered what long-term shoulder health actually looks like.
Over the years, I’ve continued to refine this system with guidance from new therapists and experience in the field, and I’ve been able to return to pain-free living—including activities like golfing, which I love but once thought would be impossible again.
This guide combines strength, mobility, and recovery into an actionable approach that will help protect and enhance your shoulder function for life.
Why Shoulder Health Matters

The shoulder joint is incredibly mobile—allowing us to reach, lift, throw, and rotate—but this mobility comes at the cost of stability.
Without strong surrounding muscles and coordinated movement patterns, the shoulder becomes vulnerable to overuse injuries, poor posture, and performance breakdowns.
Rotator cuff strains, impingement syndrome, labral tears, and even cervical spine issues often stem from poor shoulder mechanics (Informed Health, 2006).
Prioritizing shoulder health doesn’t just protect against injury; it boosts posture, breathing, upper-body strength, and long-term performance in nearly every physical activity.
Keys to Reducing Shoulder Pain
Reducing shoulder pain requires more than just stretching or resting.
Long-term relief depends on identifying the root cause, correcting movement imbalances, and consistently reinforcing proper joint function through mobility, stability, and recovery work.
Here are the foundational strategies for addressing and preventing shoulder pain effectively:
Improve Scapular Control and Positioning
The scapula (shoulder blade) serves as the foundation for shoulder movement. Poor control—like winging or excessive elevation—places unnecessary stress on the rotator cuff and impinges soft tissues.
Key Actions: Incorporate exercises like face pulls, IYTWs, and push-up plus to strengthen the serratus anterior, lower traps, and rhomboids.
Strengthen the Rotator Cuff
A weak or uncoordinated rotator cuff can lead to instability and pain during daily or athletic movements. These muscles stabilize the humeral head inside the shoulder socket.
Key Actions: Use banded external rotations, side-lying dumbbell rotations, and isometric holds to improve rotator cuff function.
Restore Thoracic Mobility
Limited upper back mobility forces the shoulder joint to compensate, especially during overhead activities. This often leads to pain in the front or top of the shoulder.
Key Actions: Mobilize the thoracic spine with foam rolling, quadruped thoracic rotations, and thread-the-needle drills.
Lengthen Tight Anterior Structures
Tight pecs and lats pull the shoulders forward and down, increasing the risk of impingement and postural dysfunction.
Key Actions: Stretch the pecs and lats regularly using doorway stretches, child’s pose variations, and foam roller lat release.
Address Muscle Imbalances
Many shoulder issues stem from overdeveloped anterior muscles (like the chest) and undertrained posterior muscles (like the upper back). Balancing these areas restores healthy joint mechanics.
Key Actions: Balance pressing with pulling movements (e.g., rows, pull-aparts) in a 1:1 or 2:1 ratio to prevent asymmetry.
Prioritize Recovery and Soft Tissue Work
Even with proper training, soft tissue tension can accumulate and lead to pain or dysfunction. Releasing tight fascia and improving circulation supports joint health and function.
Key Action: Use tools like massage guns, foam rollers, Gua Sha, or cupping to promote recovery and reduce chronic tightness.
Avoid Painful Movement Patterns
Training through shoulder pain can worsen inflammation and delay healing. The nervous system learns to move around pain, reinforcing poor mechanics.
Key Action: Modify exercises, reduce load, or shift focus temporarily when discomfort arises. Pain is a signal to adjust—not ignore.
Build Core Stability and Postural Awareness
Shoulder function is directly influenced by posture and trunk stability. A weak core often results in shoulder compensation and inefficient movement.
Key Action: Include core integration exercises like forearm planks, plank shoulder taps, and anti-rotation work to create a stable foundation for shoulder movement.
See a Doctor for Persistent Shoulder Pain or Injuries
While exercise, stretching, and recovery tools can help reduce general shoulder discomfort, some issues require professional medical evaluation.
Ignoring serious symptoms or attempting to self-treat structural injuries can delay healing and increase the risk of long-term damage.
Persistent or worsening shoulder pain—especially when accompanied by weakness, instability, limited range of motion, or nighttime discomfort—may signal a more serious condition, such as a rotator cuff tear, labral injury, tendonitis, bursitis, or impingement syndrome (Meislin, 2005).
You should consult a physician, orthopedic specialist, or physical therapist if you experience:
- Sharp or sudden pain during activity
- Pain that lasts more than 2–3 weeks with no improvement
- Inability to raise your arm overhead or across your body
- Visible swelling, bruising, or deformity around the shoulder
- Recurrent clicking, locking, or instability
- Pain that wakes you up at night or disrupts sleep
Early diagnosis and proper intervention are essential for avoiding chronic pain and long-term dysfunction.
A licensed medical provider can perform imaging (like X-rays or MRIs), assess joint integrity, and recommend an appropriate treatment plan that may include physical therapy, guided rehab, or—in some cases—surgical intervention.
Pro Tip: If your shoulder pain isn’t improving with conservative methods, don’t try to “push through it.” Getting the right diagnosis early can help you recover faster, train smarter, and avoid making the problem worse.
Best Exercises for Healthy Shoulders
A well-rounded shoulder training routine must include more than just pressing weights overhead.
Healthy shoulders rely on strong rotator cuff muscles, scapular control, and balanced movement.
These shoulder exercises are foundational for maintaining joint integrity and avoiding breakdown over time.
Face Pulls
Face pulls are one of the most effective exercises for developing scapular control and fixing posture imbalances caused by excessive pushing or sitting. They teach the upper back to support the shoulder joint properly and prevent forward rounding.
How to Do It:
- Attach a rope to a high pulley or resistance band at face height.
- Grip the handles with thumbs pointing behind you.
- Pull toward your face, keeping elbows high and wide.
- At the top, externally rotate your shoulders and squeeze the shoulder blades together. Return with control.
Muscles Worked: Rear deltoids, rhomboids, middle trapezius, rotator cuff (infraspinatus, teres minor)
Pro Tip: I include 3 sets of face pulls before almost all pressing workouts to restore scapular function and offset shoulder imbalances.
External Rotations (Band, Cable or Dumbbell)
External rotations strengthen the smaller, deeper muscles that stabilize your shoulder joint.
They are essential for preventing rotator cuff tears and improving overhead mechanics.
How to Do It:
- Anchor a band at waist height.
- With your elbow at 90 degrees and tucked tight to your side, rotate your forearm outward while keeping your upper arm still.
You can also perform this lying on your side with a light dumbbell.
Muscles Worked: Infraspinatus, teres minor, posterior deltoid
Pro Tip: Pause at the end of each rep to reinforce control and strengthen the joint through its most vulnerable position. Then, use a three-second eccentric as you let the band or dumbbell come back to the starting position.
Wall Slides
Wall slides retrain proper scapular movement and thoracic posture, helping you lift your arms overhead without compensation or impingement.
How to Do It:
- Stand against a wall with your back flat and arms in a “goal post” position.
- Keep elbows, forearms, and hands against the wall.
- Slowly slide your arms upward as far as you can while keeping contact.
- Return to the starting position.
Muscles Worked: Serratus anterior, lower trapezius, external rotators
Pro Tip: I use wall slides very often to maintain shoulder health and mobility. They help reconnect shoulder blade control and restore safe overhead movement.
Overhead Carries
Overhead carries build shoulder stability, endurance, and core control under load. They teach your shoulder to hold weight overhead in a safe, efficient position.
How to Do It:
- Press two dumbbells or kettlebells overhead, elbows fully extended and arms next to ears.
- Walk slowly and under control for 20–40 meters, maintaining tight core engagement and upright posture.
Muscles Worked: Deltoids, rotator cuff, serratus anterior, obliques, transverse abdominis
Pro Tip: Using kettlebells instead of dumbbells can make overhead carries more challenging, as the offset center of mass requires increased shoulder stability, grip strength, and neuromuscular control.
Trap-3 Raises
Trap-3 raises isolate the lower trapezius, a crucial stabilizer that helps retract and rotate your scapula. This shoulder exercise improves posture and prevents shoulder impingement.
How to Do It:
- Lie face-down on a bench or incline.
- With thumbs up, lift your arms at a 135° angle to form a “Y” shape.
- Keep your chin tucked and move slowly through the range of motion.
Muscles Worked:
Lower trapezius, middle trapezius, rhomboids
Pro Tip: I use these before overhead lifting sessions to activate the muscles responsible for smooth scapular movement. They’ve helped me avoid flare-ups from poor posture, too many hours shooting a basketball, and too much traveling.
IYTWs
IYTWs are a comprehensive scapular activation drill that targets different parts of the upper back. They’re ideal for postural realignment and restoring full shoulder function.
How to Do It:
Lie prone on a bench or stability ball.
Perform four slow, controlled arm lifts in these shapes:
- I: arms straight overhead
- Y: arms angled outward
- T: arms out to the side
- W: elbows bent in a pullback motion
Squeeze the shoulder blades on each movement.
Muscles Worked: Middle trapezius, lower trapezius, rhomboids, rear delts, rotator cuff
Pro Tip: YTWs are some of the best at-home shoulder exercises because they require no equipment and very little space. Performing them slowly and with control activates key postural and scapular stabilizer muscles. You can progress the difficulty by increasing reps or holding each position (I, Y, T, W) longer at the top of the movement to build endurance and control.
Landmine Press
The landmine press is a joint-friendly alternative to strict overhead pressing. It builds strength and stability while reducing the risk of impingement or compensation.
How to Do It:
- Anchor one end of a barbell in a landmine attachment or corner.
- From a half-kneeling position, hold the bar at shoulder height.
- Press the bar up and forward in a slight arc, then return slowly.
Muscles Worked: Anterior deltoid, triceps, serratus anterior, upper chest, scapular stabilizers
Pro Tip: This is a staple pressing exercise for me, and one of the safest exercises for building strong, muscular shoulders. It allows me to build pressing strength with much less stress on my shoulder joint.
Push-Ups
Push-ups are an essential bodyweight exercise that builds pressing strength and shoulder stability while integrating core and scapular movement.
How to Do It:
- Place hands slightly wider than shoulder-width.
- Keep your core tight and lower until your chest nearly touches the floor.
- Press back up while maintaining a straight line from head to heels.
Muscles Worked: Pectoralis major, anterior deltoids, triceps, serratus anterior
Pro Tip: Emphasize scapular protraction at the top of each push-up to activate the serratus anterior and improve shoulder blade control. This added focus helps reinforce proper shoulder mechanics during pushing movements.
Band Pull-Aparts
Band pull-aparts strengthen the muscles that stabilize your shoulder blades and counteract internal rotation from daily posture and pressing exercises.
How to Do It:
- Hold a resistance band with arms extended at shoulder height.
- Pull the band apart until it touches your chest, keeping arms straight.
- Slowly return and repeat.
Muscles Worked: Rear deltoids, rhomboids, middle trapezius
Pro Tip: Band pull-aparts are an excellent low-fatigue movement for daily shoulder maintenance. They can be used during warm-ups, between sets, or at the end of workouts to reinforce scapular retraction and postural alignment. I keep a band in my gym bag year-round. During the season, I do these before games and strength training workouts to maintain upper-back strength and posture.
Prone Swimmers
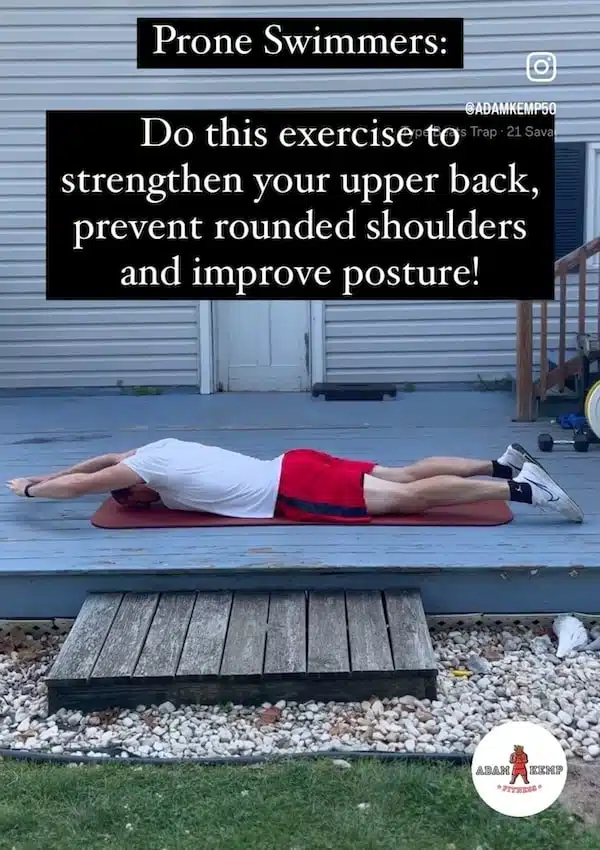
Prone swimmers develop motor control and active mobility in the shoulder joint, helping rebuild smooth, coordinated movement patterns.
How to Do It:
- Lie on your stomach with arms extended overhead.
- Sweep your arms out and around in a wide arc to your hips, rotating thumbs down midway.
- Reverse the motion slowly and repeat.
Muscles Worked:
Posterior deltoids, lower traps, rotator cuff, rhomboids
Pro Tip: Perform each rep slowly and deliberately, focusing on smooth, controlled arcs through the full range of motion. This movement helps identify and correct subtle asymmetries in shoulder mobility and motor control. This movement challenged me more than I expected when I first started, and it’s now a regular in my warm-ups and daily shoulder health program.
Around the World Shoulder Circles
The around-the-world shoulder exercise improves shoulder coordination, full-range control, and neuromuscular rhythm across multiple planes.
How to Do It:
- Hold small plates or a resistance band.
- Move your arms in a large circular arc from thighs to overhead and down to hips, keeping arms straight.
- Reverse direction and repeat.
Muscles Worked: Deltoids, rotator cuff, traps, pec minor, scapular stabilizers
Pro Tip: Use light resistance and prioritize fluid, controlled movement to develop coordination and shoulder stability across multiple planes. This drill is especially valuable for re-integrating rotational movement after periods of limited range or injury.
Dead Hangs
Dead hangs decompress the shoulder joint, improve passive range of motion, and build grip strength—all of which benefit shoulder integrity.
How to Do It:
- Grab a pull-up bar with a shoulder-width grip.
- Hang with arms fully extended and feet off the ground. Keep shoulders engaged and avoid shrugging.
- Hold for 20–60 seconds, or until failure.
Muscles Worked: Latissimus dorsi, deltoids, teres major, forearms, scapular stabilizers
Pro Tip: Incorporate dead hangs into your routine after lifting sessions or long periods of sitting to decompress the shoulder joints and improve thoracic extension. Start with short durations and gradually increase hold time as grip and joint tolerance improve.
Pull-Ups and Inverted Rows
These pulling exercises build functional strength, balance out pressing work, and develop scapular control in a full range of motion.
Pull-Ups – How to Do It:
- Grip the bar slightly wider than shoulder-width, palms facing away.
- Pull your chest to the bar, keeping your body in a straight line and scapulae engaged.
Inverted Rows – How to Do It:
- Use a barbell in a rack or TRX straps.
- Lie beneath and pull your chest up to the bar while maintaining a rigid plank.
Muscles Worked: Lats, rhomboids, traps, posterior delts, biceps, rotator cuff
Pro Tip: Pullups, chin-ups, and inverted rows are similar yet distinct exercises. Begin with inverted rows or assisted pull-ups to build foundational scapular control and pulling strength. Use a slow tempo and full range of motion to maximize muscular engagement and joint stability before progressing to more advanced variations.
Forearm Plank
The forearm plank is more than a core exercise—it trains the foundational postural muscles that support healthy shoulder function.
A properly executed plank reinforces scapular stability, spinal alignment, and deep core activation, all of which help prevent shoulder compensation and breakdown during pressing or overhead work.
How to Do It:
- Start on your elbows and toes with your elbows stacked under your shoulders.
- Engage your core by pulling your rib cage down and squeezing your glutes.
- Your body should form a straight line from your head to your heels.
- Keep your shoulder blades slightly protracted (gently pushing away from the floor) without shrugging.
- Hold for 20–60 seconds with full-body tension.
Muscles Worked: Transverse abdominis, obliques, rectus abdominis, serratus anterior, rhomboids, rotator cuff, scapular stabilizers
Benefits:
- Enhances deep core stability and shoulder blade control
- Promotes proper posture and neutral spine alignment under load
- Reduces compensation patterns that lead to shoulder overuse
- Transfers to better shoulder performance in dynamic lifts
Pro Tip: I often use planks as part of my activation series before overhead pressing or shooting-focused workouts. They help me lock in spinal alignment and reinforce scapular control without fatiguing the shoulder joint itself.
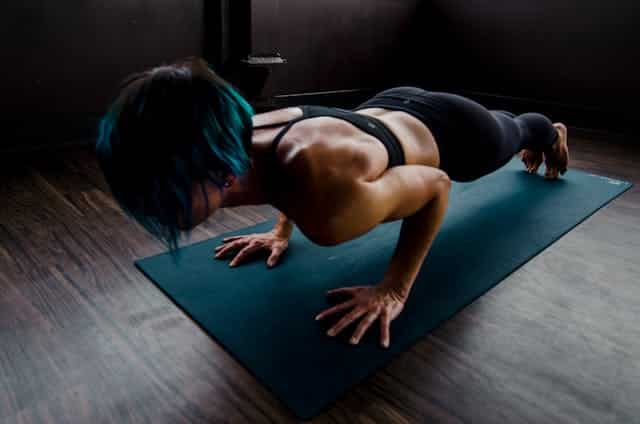
Push-Up Plus
The push-up plus isolates and strengthens the serratus anterior, one of the most important but undertrained muscles for shoulder health.
A strong serratus stabilizes the scapula against the rib cage and enables smooth, pain-free overhead movement.
How to Do It:
- Begin in a standard push-up position with hands under shoulders and core engaged.
- Lower yourself like a regular push-up.
- At the top of each rep, “push” your shoulder blades forward by protracting your scapulae—without bending the elbows—then return to a neutral position.
- This added motion is the “plus.”
Muscles Worked: Serratus anterior, pectoralis major, anterior deltoid, triceps, rotator cuff
Benefits:
- Directly strengthens the serratus anterior for improved scapular positioning
- Reinforces controlled protraction, vital for pain-free overhead pressing and reaching
- Prevents winging of the scapula, a common issue in athletes and lifters
- Enhances shoulder joint control during pushing movements
Pro Tip: The push-up plus is effective in both rehab and performance training phases. It helps strengthen the serratus anterior and prevents scapular winging, which is a common contributor to shoulder instability and poor overhead mechanics.
Plank-Shoulder Taps
Plank shoulder taps train anti-rotation, core stability, and scapular control—key components for protecting the shoulder joint during dynamic movements.
This simple bodyweight exercise teaches your body to resist twisting while maintaining proper shoulder positioning.
How to Do It:
- Start in a high plank position with hands directly under your shoulders and feet slightly wider than hip width for added stability.
- Brace your core and keep your hips level as you lift one hand to tap the opposite shoulder.
- Pause briefly, then return it to the floor and repeat on the other side.
- Move slowly and avoid swaying or twisting.
Muscles Worked: Serratus anterior, rotator cuff, deltoids, rectus abdominis, obliques, spinal stabilizers
Benefits:
- Enhances anti-rotational core strength and shoulder control
- Reinforces scapular stability during loaded or dynamic movements
- Helps identify and correct asymmetries in shoulder function and trunk stability
- Excellent low-impact option for shoulder prehab or warm-ups
Pro Tip: Move with control and minimize hip shift to fully engage your core and scapular stabilizers. A slower tempo increases difficulty without adding an external load.
Dumbbell Floor Press
The dumbbell floor press is one of the best dumbbell chest exercises and builds upper body pressing strength while reducing shoulder strain compared to a traditional bench press.
The limited range of motion protects the shoulder joint, making it ideal for strength development during rehab or in-season maintenance.
How to Do It:
- Lie flat on your back with knees bent and feet planted.
- Hold dumbbells at shoulder width with elbows resting lightly on the floor.
- Press the weights upward until your arms are fully extended, then lower under control until your triceps touch the floor.
- Avoid bouncing and maintain a neutral wrist position throughout.
Muscles Worked: Pectoralis major, anterior deltoids, triceps, scapular stabilizers
Benefits:
- Builds pressing strength with reduced shoulder joint stress
- Prevents excessive shoulder extension and keeps the movement joint-friendly
- Encourages greater scapular stability due to the floor-supported base
- Useful alternative to barbell bench pressing for individuals with shoulder sensitivity
Pro Tip: Use a neutral grip (palms facing each other) to further reduce shoulder strain and emphasize joint stability. Focus on controlled tempo to maximize muscle engagement while minimizing risk.
Best Stretches for Healthy Shoulders
Stretching and mobility are both essential for healthy shoulders, but they serve different purposes.
- Stretching is passive—it improves tissue length and elasticity.
- Mobility, on the other hand, is active—it helps you control movement through a full range of motion.
When combined, these techniques reduce stiffness, improve posture, and create more resilient shoulder joints.
Sleeper Stretch
The sleeper stretch is probably the best stretch for healthy shoulders as it targets the posterior capsule of the shoulder, which often becomes tight in overhead athletes or individuals with poor posture.
Tightness here can contribute to impingement or limited internal rotation.
How to Do It:
- Lie on your side with your bottom arm bent at 90 degrees and your head supported by a pillow.
- Use your top hand to gently push your forearm down toward the floor while keeping your shoulder and upper arm pinned to the ground.
- Hold without forcing the range.
Muscles & Areas Targeted:
Posterior shoulder capsule, infraspinatus, teres minor, rear deltoid
Benefits:
- Improves internal rotation and shoulder joint mobility
- Reduces stress on the rotator cuff and posterior shoulder structures
- Helps restore full range of motion after repetitive overhead movements
Pro Tip: To increase effectiveness and reduce irritation, perform this stretch after training or in the evening when the body is warm and relaxed.
Banded, Towel, or Dowel Shoulder Dislocations
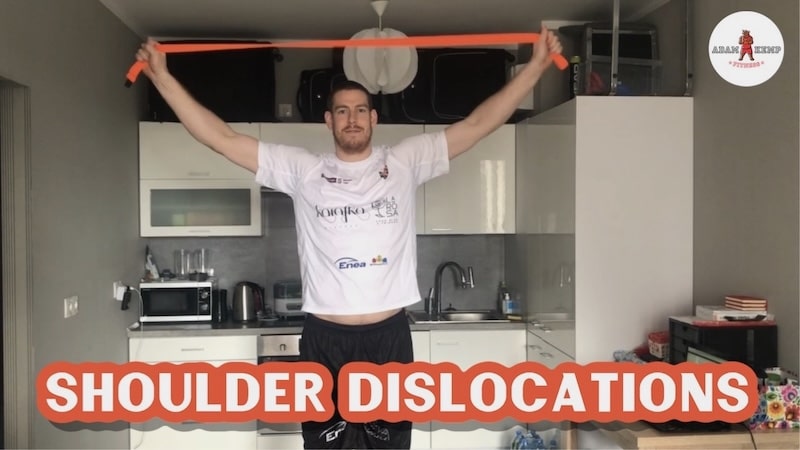
This dynamic mobility drill enhances shoulder rotation, control, and coordination. It’s especially useful as a warm-up or reset before upper-body training or throwing.
How to Do It:
- Grab a resistance band, towel, or PVC dowel with a wide grip.
- With arms locked out, raise the band overhead and bring it behind your body, then return to the front.
- Move slowly and only go as far as your shoulder mobility allows without pain or compensation.
Muscles & Areas Targeted: Pecs, lats, anterior delts, rotator cuff, shoulder capsule
Benefits:
- Improves internal and external rotation
- Enhances overhead control and posture
- Prepares shoulders for high-load or dynamic activity
Pro Tip: Start with a wide grip and gradually narrow it over time as your mobility improves. Keep your ribs down and avoid flaring your lower back.
Wall Angels
Wall Angels are a postural mobility exercise that activates the scapular stabilizers and reinforces shoulder blade movement.
They help retrain overhead mechanics by improving control and alignment through shoulder elevation.
How to Do It:
- Stand with your back, head, and glutes against a wall.
- Raise your arms to form a “goal post” position (elbows bent at 90 degrees, forearms against the wall).
- Slowly slide your arms upward while maintaining contact with the wall, then return to the starting position.
- Keep your core engaged and avoid rib flaring.
Muscles & Areas Targeted: Lower trapezius, rhomboids, rotator cuff, posterior deltoids, serratus anterior
Benefits:
- Reinforces upright posture and scapular upward rotation
- Strengthens the muscles responsible for overhead movement
- Improves shoulder mobility without requiring external weight
- Corrects poor habits caused by prolonged sitting or pressing-heavy training
Pro Tip: Perform these slowly and with control, aiming for 10–12 reps while maintaining constant contact with the wall. If you can’t keep everything touching the wall, reduce range and focus on clean movement.
Doorway Pec Stretch
The doorway pec stretch targets tight pectoral muscles that contribute to rounded shoulders and poor overhead mechanics. It’s a simple, effective way to lengthen shortened anterior tissues and open up the chest.
How to Do It:
- Stand in a doorway and place one forearm against the frame with your elbow bent at 90 degrees.
- Step forward slightly until you feel a gentle stretch through the front of the shoulder and chest.
- Hold for 20–30 seconds, then switch sides.
Muscles & Areas Targeted:
Pectoralis major, pectoralis minor, anterior deltoid
Benefits:
- Opens the chest and anterior shoulder muscles
- Reduces internal shoulder rotation and slouched posture
- Improves scapular positioning and overhead motion
- Easy to incorporate at home, the gym, or the office
Pro Tip: For a more complete stretch, experiment with different arm angles—slightly above or below shoulder height—to target both heads of the pec muscles. Use this stretch after upper-body training or long hours at a desk.
Child’s Pose With Reach Variations
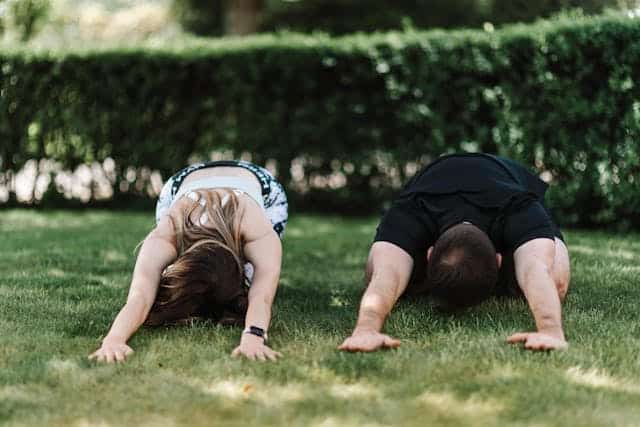
This restorative stretch targets the lats, serratus anterior, and thoracic spine. It promotes relaxation and shoulder flexion while encouraging diaphragmatic breathing.
How to Do It:
- Start in a kneeling position, then sit back on your heels and extend your arms forward on the floor.
- For added shoulder targeting, walk your hands to one side and reach the top arm further.
- Hold and breathe deeply into the side of your rib cage.
Muscles & Areas Targeted: Lats, serratus anterior, triceps, thoracic spine
Benefits:
- Increases shoulder flexion and lateral rib mobility
- Opens up tight lats that restrict overhead movement
- Encourages thoracic extension and full rib expansion
Pro Tip: Breathe slowly through your nose and into your back ribs to maximize stretch depth and calm the nervous system post-workout.
Thread the Needle
Thread the Needle is a gentle mobility drill that improves thoracic spine rotation and stretches the posterior shoulder. It’s especially useful for improving overhead mechanics and rotation control.
How to Do It:
- Start in a quadruped (hands and knees) position.
- Slide one arm underneath your body and across the floor, allowing your torso to rotate and your shoulder to drop.
- Hold briefly, then return and switch sides.
Muscles & Areas Targeted: Posterior shoulder, rhomboids, thoracic spine, rear deltoid
Benefits:
- Improves thoracic rotation and shoulder blade mobility
- Loosens tight posterior chain tissues affecting overhead movement
- Enhances spinal flexibility and posture
Pro Tip: Exhale fully as you rotate and “thread” your arm to deepen the stretch and engage your obliques. Use a foam roller to make the stretch more intense.
Quadruped Thoracic Rotation (Hand Behind Head)
This dynamic stretch improves thoracic rotation and reinforces segmental spinal mobility—a key component of proper shoulder function during throwing, pressing, and rotational sports.
How to Do It:
- Start on all fours.
- Place one hand behind your head, elbow pointing outward.
- Rotate your upper body to bring your elbow toward the ceiling, then slowly return.
- Keep your hips square and repeat for reps before switching sides.
Muscles & Areas Targeted: Thoracic spine, obliques, spinal erectors, upper traps
Benefits:
- Increases rotational mobility in the spine and shoulder girdle
- Helps reduce compensations during overhead or loaded movements
- Improves alignment and spinal extension capacity
Pro Tip: Keep your movement slow and intentional. Avoid forcing the range—focus on smooth, controlled rotation and full exhalation to enhance mobility.
Kneeling Foam Roller Floor Slide
The kneeling foam roller floor slide is an underrated shoulder mobility drill that improves scapular upward rotation, shoulder flexion, and thoracic extension.
It combines active range of motion with soft-tissue pressure and postural control—making it ideal for warming up or restoring overhead mechanics.
How to Do It:
- Kneel in front of a wall or squat rack with a foam roller placed vertically on the ground in front of you.
- Place your forearms on the roller, thumbs pointing up, and keep your hips stacked over your knees.
- Slowly roll the foam roller forward as you sit your hips back slightly and lower your chest toward the floor.
- Pause when you feel a strong stretch in the shoulders and lats, then roll back to the starting position.
Muscles & Areas Targeted: Lats, triceps, serratus anterior, thoracic spine, lower traps, posterior delts
Benefits:
- Enhances shoulder flexion and upward rotation
- Opens the thoracic spine and improves overhead posture
- Encourages active control of range without forcing joint motion
- Great for lifters, overhead athletes, and anyone dealing with shoulder tightness
Pro Tip: To intensify the stretch and activate the serratus anterior, drive your forearms gently down into the foam roller as you reach forward. This helps engage stabilizing muscles while improving end-range control.
Best Tools for Shoulder Health and Recovery

Even the best shoulder workouts can’t prevent every ache and tight spot. That’s where recovery tools come in.
From soft-tissue release to blood flow stimulation, these tools are vital for longevity and day-to-day performance.
Based on my own experiences, here are the most effective recovery tools for healthy shoulders.
Gua Sha
Gua Sha is a traditional soft-tissue technique that helps release fascial restrictions, break down scar tissue, and promote blood flow. It’s especially useful for chronic tightness and overworked muscle groups.
How to Use It:
- Apply a small amount of oil or lotion to the target area.
- Use a Gua Sha tool to scrape gently along the muscle fibers in long, even strokes.
- Focus on areas like the traps, rear delts, and upper back, using moderate pressure and slow, controlled motion.
Benefits:
- Reduces fascial adhesions and scar tissue buildup
- Increases localized circulation and speeds up muscle recovery
- Helps relieve chronic tension and improve tissue quality
Pro Tip: Use Gua Sha after travel days, long training blocks, or when dealing with stubborn tight spots in the traps or rear shoulders. Start with light pressure and gradually build up as tolerated.

Last update on 2025-04-28 / This article includes affiliate links/Images via Amazon Product Advertising API. I may earn commissions on purchases made through these links.
Cupping Therapy
Cupping therapy uses negative pressure to draw blood to tight or inflamed tissues, reducing pain and improving range of motion.
It’s especially effective around the scapula, traps, and posterior shoulder region.
How to Use It:
- Apply silicone, plastic, or glass cups to the shoulder area—targeting areas with stiffness or restriction.
- Leave the cups on for 5–10 minutes, or use dynamic cupping by moving the cups slowly across the muscle.
Benefits:
- Enhances blood flow and tissue hydration
- Loosens muscle tension and improves soft tissue mobility
- Can improve neuromuscular activation and muscle responsiveness
Pro Tip: Cupping is especially effective before training or competition to stimulate blood flow and prep the nervous system. Use lighter suction on sensitive areas and avoid using cups over recent injuries. Try the Therabody TheraCup for DIY cupping therapy at home.

Last update on 2025-04-28 / This article includes affiliate links/Images via Amazon Product Advertising API. I may earn commissions on purchases made through these links.
Massage Guns
Percussive massage guns deliver percussive therapy to break up muscle stiffness, improve circulation, and activate target muscles before or after workouts.
They offer a fast, effective way to manage soreness and tension and provide DIY joint pain relief.
How to Use It:
- Use the massage gun on medium speed and moderate pressure over large muscle groups such as the deltoids, pecs, and upper traps.
- Apply for 30–60 seconds per area before workouts, or use slower strokes for recovery afterward.
Benefits:
- Increases blood flow and reduces muscle soreness
- Activates muscles prior to training
- Helps flush out metabolic waste post-exercise
Pro Tip: Use a massage gun during warm-ups to stimulate the delts, pecs, and upper traps, especially before upper-body training or overhead lifting. I own a TheraGun G5 Pro and Hypervolt Go 2, both of which provide excellent relief. The Hypervolt Go 2 is especially useful as a more affordable massage gun.

Last update on 2025-04-27 / This article includes affiliate links/Images via Amazon Product Advertising API. I may earn commissions on purchases made through these links.
Shoulder Massager (Shiatsu or Heated)
Electric shoulder massagers provide deep pressure and passive release, making them ideal for end-of-day recovery. Heated models also help relax stiff muscles and improve circulation.
How to Use It:
- Place the massager over your upper traps and shoulders.
- Allow the rotating nodes to knead the tissue, and activate the heat setting if available.
- Use for 10–15 minutes while seated or lying down.
Benefits:
- Provides deep-tissue pressure and stress relief
- Enhances blood flow and reduces daily muscle tension
- A convenient recovery option when hands-on therapy isn’t available
Pro Tip: Use a Shiatsu shoulder massager at the end of the day or on off-days to promote relaxation, enhance circulation, and accelerate recovery—especially if you don’t have access to a physio or massage therapist.

Last update on 2025-04-27 / This article includes affiliate links/Images via Amazon Product Advertising API. I may earn commissions on purchases made through these links.
Foam Rolling
Foam rolling is a simple self-myofascial release technique that helps reduce muscle tension, improve mobility, and restore optimal movement patterns.
When used correctly, it’s one of the most accessible and effective self-massage tools for supporting shoulder health—especially for active individuals, lifters, and athletes.
How to Use It:
- Lie on your side or back and position the foam roller under targeted muscle groups like the lats, upper traps, rhomboids, or posterior deltoids.
- Slowly roll back and forth over the muscle, pausing on any tight or tender areas.
- You can also perform thoracic spine extensions over the roller by lying on it horizontally under your upper back and extending gently over it.
Muscles & Areas Targeted: Lats, upper traps, posterior delts, rhomboids, pec minor, thoracic spine, long head of the triceps
Benefits:
- Reduces muscle stiffness and myofascial restrictions
- Improves shoulder mobility, especially in overhead positions
- Enhances thoracic extension and posture
- Prepares muscles for training and accelerates post-workout recovery
Pro Tip: Focus on the lats and upper back before pressing or overhead work to increase shoulder range of motion. Rolling for 30–60 seconds per area is usually sufficient. Avoid rolling directly over the shoulder joint or bones to prevent irritation.

Last update on 2025-04-28 / This article includes affiliate links/Images via Amazon Product Advertising API. I may earn commissions on purchases made through these links.
Massage Ball or Lacrosse Ball
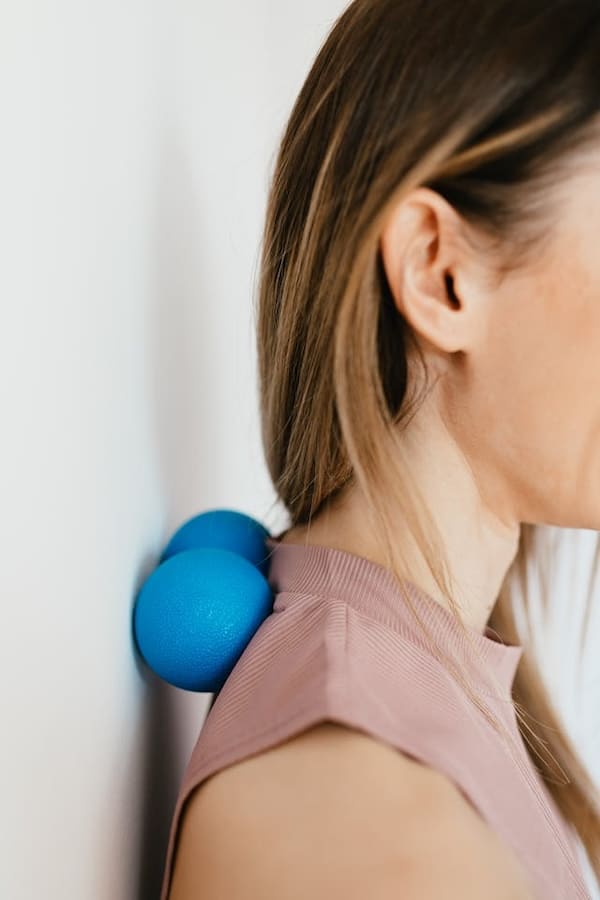
Massage balls are one of the most effective tools for pinpointing tension in small or hard-to-reach areas, especially around the rear deltoids and scapula.
Unlike larger tools, a massage ball allows for deep, localized pressure—perfect for breaking up knots and improving mobility in the upper back and posterior shoulder.
How to Use It:
- Place the massage ball between your rear shoulder (just behind the deltoid or near the scapula) and a wall or the floor.
- Apply gentle pressure and roll slowly over tight spots, pausing for 20–30 seconds on any areas of tenderness.
- Use small, controlled circles or slow back-and-forth motions.
- Wall version: More beginner-friendly and allows for better control of pressure.
- Floor version: Provides deeper intensity for those with higher tolerance or significant stiffness.
Muscles & Areas Targeted: Rear deltoids, infraspinatus, teres minor, rhomboids, posterior shoulder capsule
Benefits:
- Releases knots and adhesions in tight shoulder muscles
- Improves range of motion in external rotation and horizontal abduction
- Helps reduce tension caused by poor posture or overuse
- Complements other mobility or strengthening exercises by improving tissue quality
Pro Tip: Use a massage ball or a lacrosse ball against the wall to warm up the rear delts before upper-body training, and on the floor for deeper post-workout release. Spend 1–2 minutes per side, and avoid directly rolling over the shoulder joint itself to prevent irritation.

Last update on 2025-04-27 / This article includes affiliate links/Images via Amazon Product Advertising API. I may earn commissions on purchases made through these links.
How to Build a Daily Routine for Healthy Shoulders
A consistent shoulder care routine doesn’t need to be time-consuming. The goal is to integrate strength, mobility, and recovery in a manageable system that fits your life.
Sample Daily Routine (10–15 Minutes):
- Dynamic Mobility (2–3 mins): Dislocations, arm swings, wall slides
- Strength Activation (5 mins): Face pulls, external rotations, pushups
- Stability Work (3–5 mins): Overhead carries, landmine press
- Recovery (5 mins): Massage gun or Gua Sha + stretching
Adjust based on your training load, work demands, or injury history. Consistency always wins.
Common Mistakes to Avoid for Optimal Shoulder Health
Avoiding common pitfalls is just as important as doing the right exercises. These mistakes often lead to nagging pain and performance plateaus:
- Overdeveloping front delts and pecs while neglecting rear shoulders
- Poor overhead technique or limited thoracic mobility
- Skipping warm-ups or neglecting recovery
- Ignoring scapular movement and posture during lifts
- Training through pain instead of modifying exercises
Final Thoughts: How to Build Healthy Shoulders
Building healthy shoulders is not about chasing heavy overhead presses or simply stretching tight muscles.
It’s about developing balance, control, and resilience through smart, consistent training.
Strong, pain-free shoulders come from a blend of mobility, stability, and recovery work—performed with purpose and attention to detail.
Whether you’re recovering from an injury, trying to improve posture, or aiming to enhance performance in the gym or in sport, the key is to train smarter, not just harder.
That means prioritizing movement quality, activating the right muscles at the right time, and reinforcing stability with intentional reps—not just going through the motions.
You don’t need complicated routines or advanced equipment to get started.
Many of the best shoulder exercises and mobility drills can be done at home, with just your body weight or a few basic tools.
The goal is consistency: integrate a few key exercises, stretches, and recovery techniques into your weekly routine and build from there.
Healthy shoulders don’t just feel better—they move better, lift better, and last longer.
And when you commit to training them intelligently, you’ll build a foundation of upper-body strength that supports everything else you do.